Custom Length Based Loss Limits in CertiFiber Pro
If you are testing an "engineered link" using custom loss values for connectors and/or splices, you will need to know how to configure a custom test limit. A YouTube video is also available detailing how this is done.
You can create up to 20 custom test limits in the CertiFiber Pro.
- Change to the PROJECT you wish to put this in or tap PROJECT from the home screen.
- Tap NEW TEST. (If the Module: does not indicate CertiFiber Pro, tap Module to change it to CertiFiber Pro)
- Tap Test Limit > MORE > Custom > MANAGE > Create.
- With a Fixed limit you will not have the chance to change the loss values for connectors and splices, this is for a single loss value for the whole link.
- Tap the Connector Loss button to adjust the loss limit per connector:
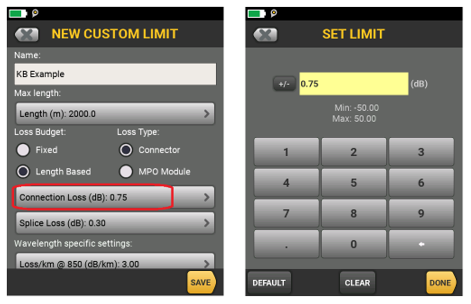
注記: Loss Type: Connector and MPO Module are descriptors for the same "connection loss" field. The idea of the MPO Module limit is to have a single loss value for the whole MPO connector as they are often specified. We recommend you make separate custom loss limits for Connector and MPO Module if you are testing both on one site. Use the Name field to differentiate the two custom limits.
- To set the loss for splices, select the Splice Loss button:
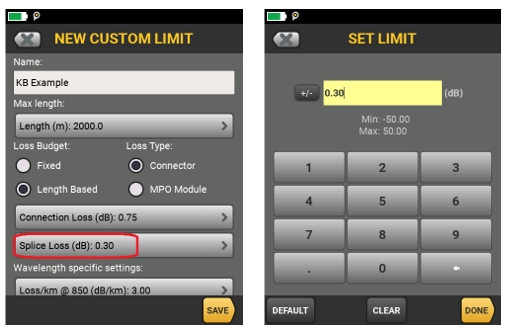
- For this example, I have named this custom limit “KB Example”; this will be the limit name on the test report. (Limit names can be up to 25 characters)
- Tap “Loss/km @ [wavelength]” for any custom loss values you would like to use for the fiber.
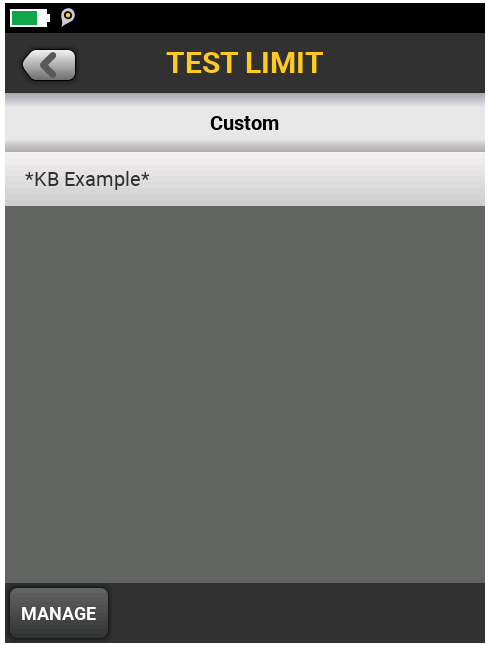
- Once done, tap SAVE to store your new the custom test limit:
-
If you tap your custom limit here, it will return you to the TEST SETUP screen with this limit selected, shown below. Notice the placement of the asterisks before and after the custom limit name, this is to identify that it is a custom limit and they cannot be removed.

- Don't forget to tap SAVE again to store your new SETUP, then select it and tap Use Selected to move it to the HOME screen.


