Certifying unpinned MPO to LC links with the MultiFiber Pro
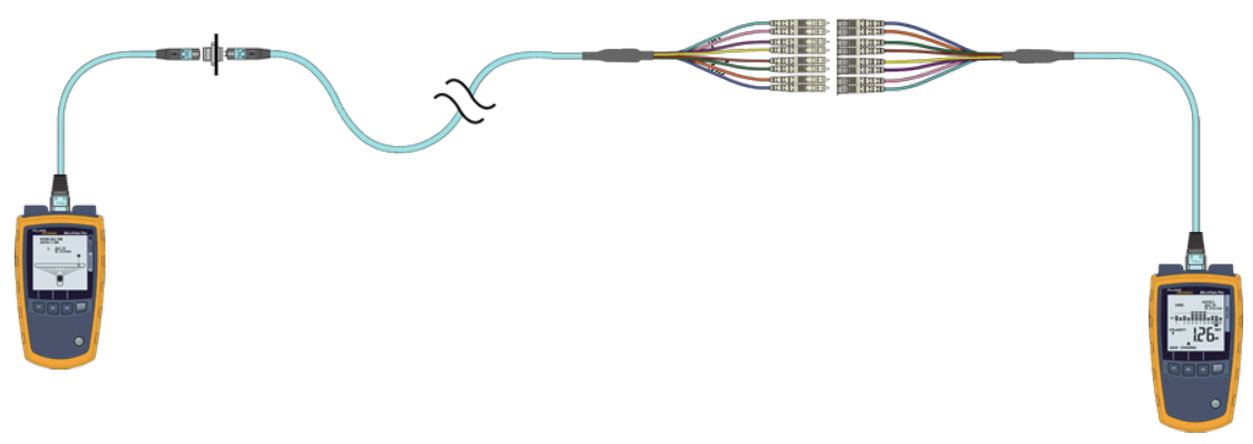
This article describes a method for certifying multimode links with 12, 10 or 8 fiber unpinned MPO connectors at one end and LC connectors at the far end using a MultiFiber Pro. Although the article describes a Type B link, the procedure is the same for Type A and C. You can test this type of link using a duplex tester such as the CertiFiber Pro, but it is easier and quicker using the MultiFiber Pro.
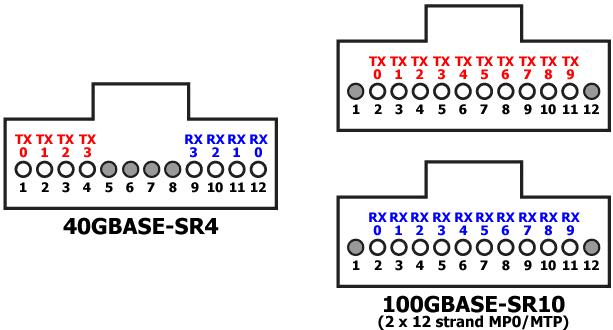
If your trunk cable only has 8 fibers to support 40GBASE-SR4 or 10 fibers to support 100GBASE-SR10, MultiFiber Pro will automatically recognize it as a valid link and will not fail the link if the correct fibers are absent, shown below:
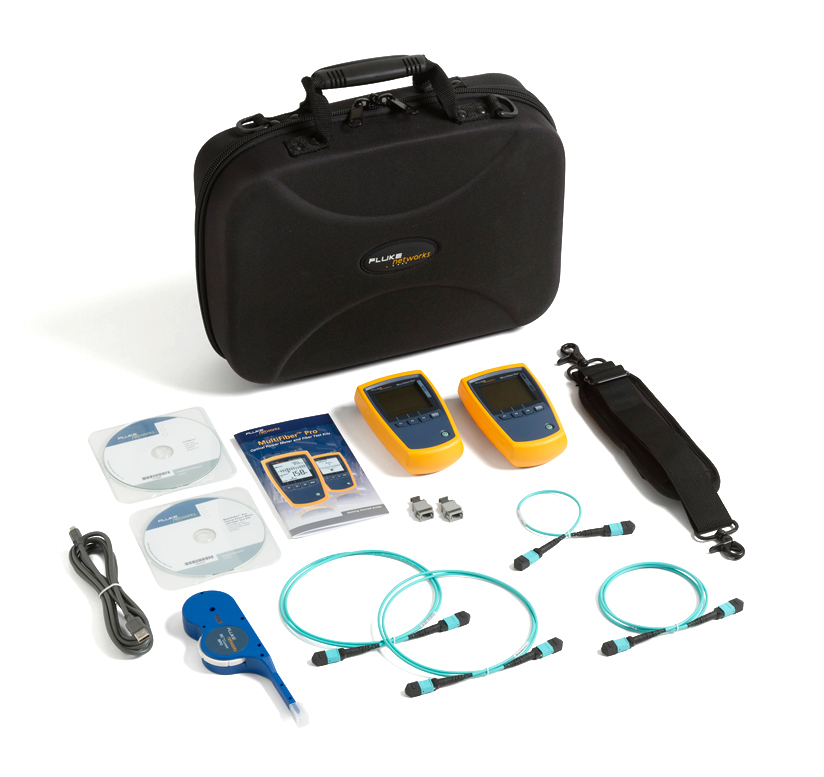
In addition to the following items:
- MFTK1200
- Type B pinned MPO to MPO/MTP 1 m test cord
- Type B pinned MPO to LC breakout cable (Inserting unpinned cords into the MultiFiber Pro source or meter will result in unstable readings)
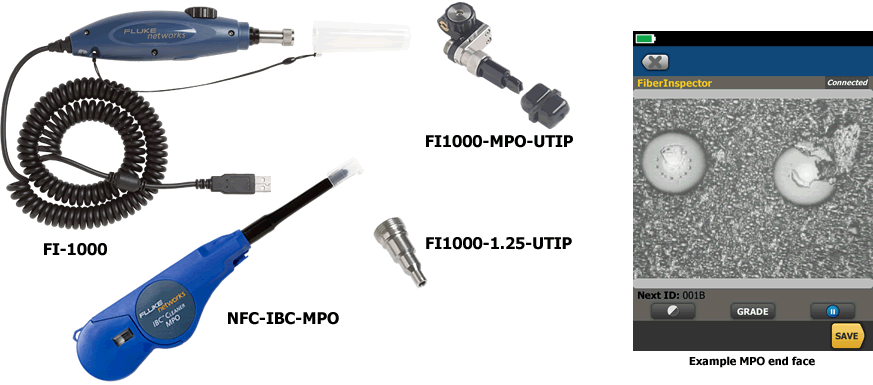
You will need to have the capability to inspect both the MPO and LC end faces. (FI-7000 FiberInspector™ Pro).
テスト・リミット
テスト対象リンクの予想損失を計算して、MultiFiber Pro に入力する必要があります。弊社から適切なテスト・リミットを推奨することはできません。ケーブル配線システムの設計者に相談してください。Information on application test limits can be found in the Versiv test limit document.
テスト・リミットの入力
-
Select the desired wavelength by pressing the F3 key.

-
MENU/SELECT(メニュー/選択)キーを 3 秒押し続けると、以下が表示されます。
-
F1 キーを押して、カーソルをLOSS LIMIT(損失リミット)に動かします。

-
MENU/SELECT(メニュー/選択) キーを押して、それを選択します。
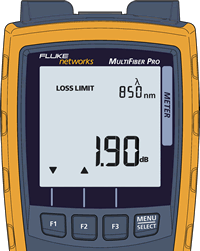
- F1 キーと F2 キーを使用して、要件と一致するように dB 値を変更します。
- 終了したら、MENU/SELECT(メニュー/選択) キーを押して保存します。
- MENU/SELECT(メニュー/選択)キーを約 3 秒間押し続け、セットアップ・メニューを終了します。
測定
- Turn on the source and meter allowing them to stabilize for at least 5 minutes. If the instruments have been stored at the same temperature as your test area, 5 minutes is usually long enough. 保管場所と使用場所で大きな温度変化がある場合は、安定させるまでにもう少し時間がかかることがあります。We shall check the sources for stability in step 9).
-
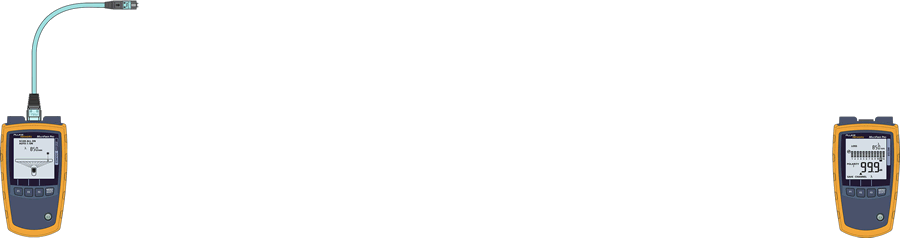
Connect the meter and the source together using your pinned MPO test cord and press MENU/SELECT until you see POWER on the display:
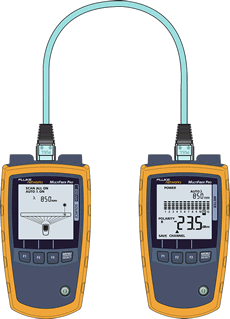
- パワー・メーターの画面で、2 つ以上の楕円形が欠けていないことを確認してください。理想は、12 のすべてのチャネルで、それぞれ 5 つの楕円形が表示されることです。いずれかのチャネルで楕円形が 3 つ未満のものがあれば、テスト・コードの交換が必要な可能性があります。MultiFiber Pro のポートのクリーニングも必要かもしれません。2 つ以上の楕円形が欠けている状態でテストを続けると、予測不可能なテスト結果になります。
-
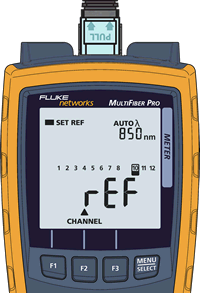
MENU/SELECT(メニュー/選択)を押して、SET REF(基準値の設定)を表示させます。(基準値の設定は自動開始します)
-
完了すると、F1 キーの上部に SAVE(保存)が表示されます。Press F1 and the screen should report 0.00 dB:
- テスト・コードを 30 秒間つなげたままにし、ソースの安定性をチェックします。損失に変化があれば、測定値が安定するまで、ステップ 4 を繰り返します。
-
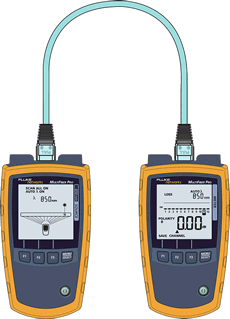
Disconnect from the meter side: (DO NOT DISCONNECT FROM THE SOURCE)
-
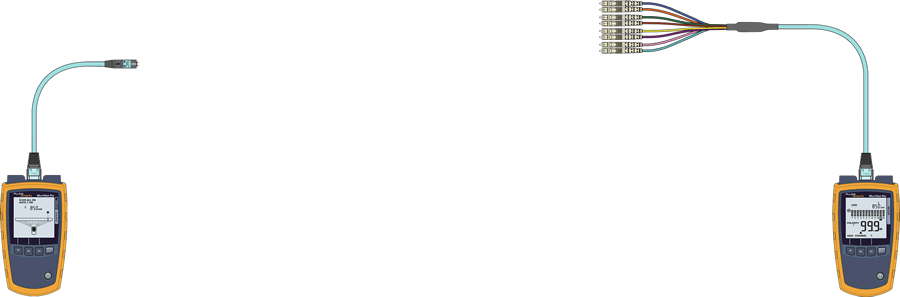
Insert the pinned MPO to LC breakout cable into the MultiFiber Pro meter:
-
認証するリンクに接続します。In six seconds, you will have the loss across all fibers.
9a. This can also be used on hybrid MPO to LC cables
補足情報
- 損失を確認するにあたって、各楕円形は入力したテスト・リミットの 25% を表します。
- 測定された損失値が -0.09 dB 未満になると、テスト結果は不合格になります。この場合、ソースが安定していなかったことが原因と考えられます。基準値を再設定してください。
- MPO テスト・コードは頻繁に点検および交換してください。マルチモード MPO/MTP の嵌合寿命は、一般的に挿抜回数 500~1000 回です。
- The MultiFiber Pro will store 3,000 fiber loss results (250 MPO links, each with 12 fibers or 375 MPO links, each with 8 fibers)
- 付属のマイクロ USB ケーブルを使用して、結果を LinkWare PC にインポートできます。
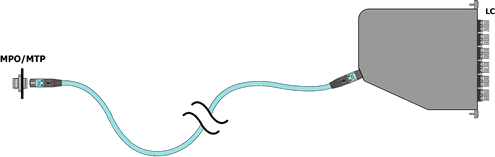
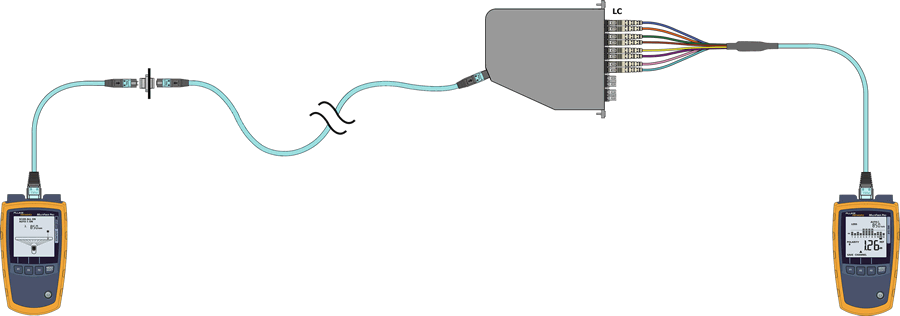
- While this article shows the image of an MPO trunk cable terminated with an MPO to LC cassette, these instructions also apply to trunk cables that may have an MPO connector on one end, and LC connectors on the far end.
テスト・レポートの作成
LinkWare PC ソフトウェアの最新バージョンを使用して、メーターを標準のマイクロ USB コード(付属)で PC に接続します。Click on the red arrow in the tool bar, selecting MultiFiber Pro. Follow the import wizard instructions.


