データセンターでのクロス接続と相互接続
2021 年 7 月 14 日/一般、学習、インストールとテスト、ベストプラクティス
※ 本記事は日本語にて翻訳/レイアウトされております。ダウンロードはこちらから。
In the data center space, cross connects and interconnects via patch panels are commonly used between active equipment purely for management and flexibility, typically residing between switch tiers or between switches and servers. Some scenarios even call for using multiple cross connects or interconnects within the same channel, or a combination thereof.
Most of you probably know already that it’s best to test the permanent link vs. a channel. The permanent link is the fixed portion of the channel that is typically from patch panel to patch panel in the data center or from patch panel in the telecommunications room to a work area outlet in the LAN. In contrast, the channel includes all the cabling and patch cords between two pieces of active equipment.
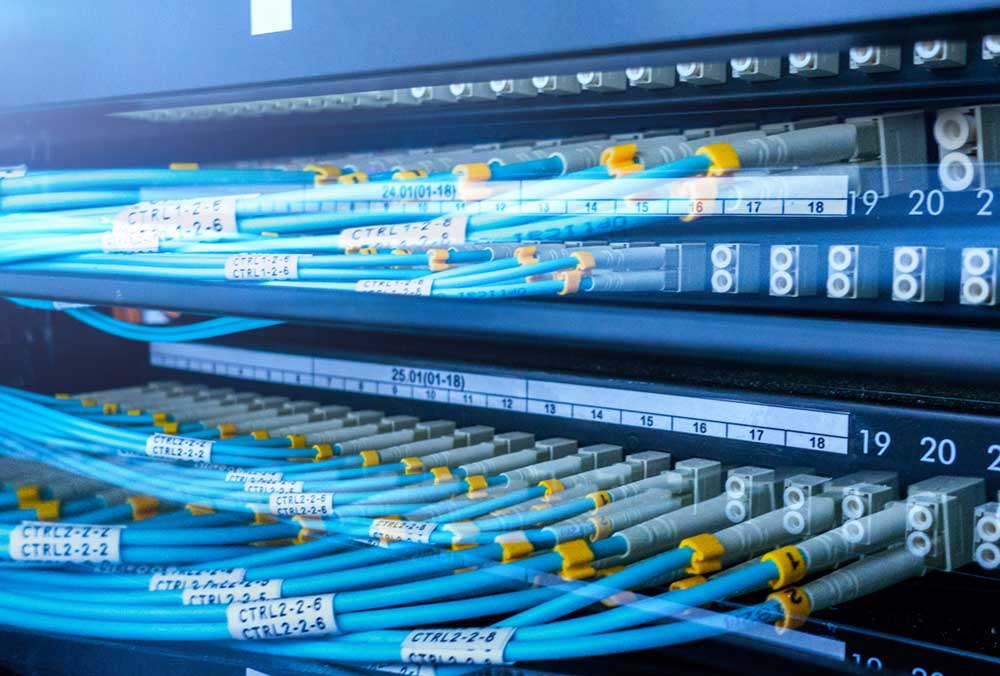
It’s typically best to test the permanent link because it’s the foundation of the network and patch cords are often moved around or switched out. When you pass permanent link testing and use standards-compliant patch cords, your channel should pass. But if you do channel testing and later swap out patch cords, you might as well throw your test results right out the window.
But what happens if we add a cross connect into the mix?
Interconnect vs. Cross Connect
What is an interconnection? It’s essentially the use of a patch panel at the active equipment used to distribute links from the equipment to other equipment in the data center, which is why it is often referred to as a distribution panel. Data centers often deploy interconnects at both ends of a channel where the connection from one panel to another is the permanent link.
What is a cross connect? A cross connect in the data center is the use of additional patch panels that mirror the ports of the equipment being connected, essentially creating a separate patching area where any equipment port can be connected to any other equipment port using patch cords at the front of the panels.
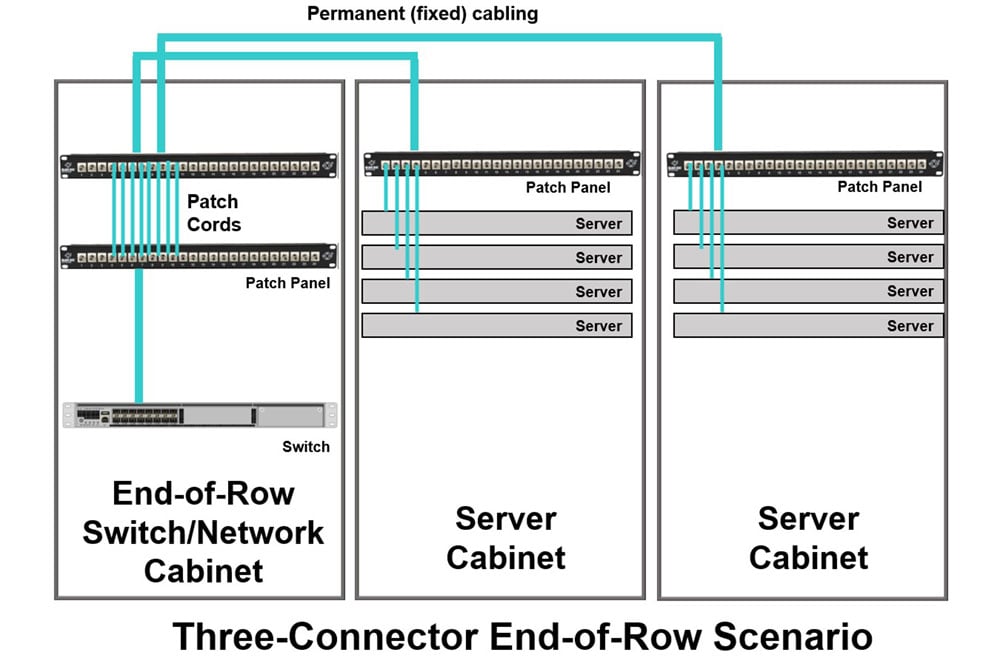
Every data center is different. Some only use interconnects at active equipment, essentially creating a two-connector channel with the permanent link between the two patch panels. Others may use a separate cross-connect with an interconnect at one end to connect to equipment, creating a three-connector channel (see end-of-row diagram below). Still others may use interconnects at both ends with a separate cross-connect in between for making changes, essentially creating a four-connector channel, as shown in the cross connect diagram below.
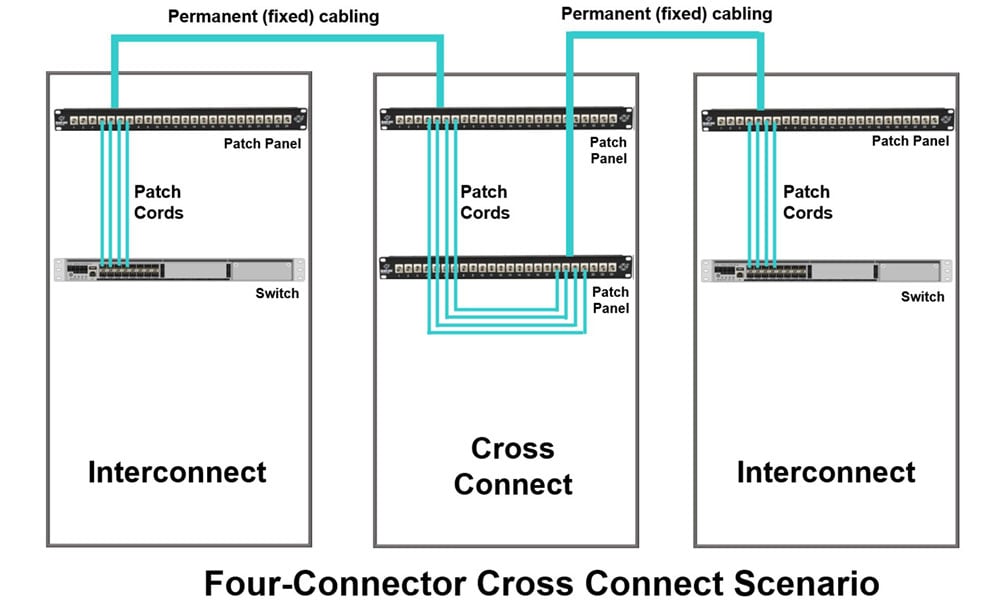
While some also use point-to-point cabling with no interconnect and no cross connect to directly connect equipment, this is typically only done within the same rack or cabinet such as with a Top-of-Rack switch that connects directly to servers below. Point-to-point cabling is not recommended between equipment located in different cabinets or data center functional spaces.
What is the Benefit of a Cross Connect?
While obviously a cross connect in a data center requires more cabling and connectivity and places more connection points (and therefore insertion loss) into a channel, it offers the benefit of being able to isolate active equipment and ease moves, adds and changes.
In the case of a colocation data center, for example, cross connects are separate spaces used to create the connection between service provider equipment that resides in the meet-me room and tenant equipment. With the cross connect cabled up to service provider equipment via an interconnect panel on one end and to tenant equipment on the other end, bringing new service on line for a tenant is as easy as adding patch cord between the tenant side and service provider side of the cross connect.
Cross connects are also highly beneficial in middle-of-row or end-of-row scenarios where access switches located at the end or middle of a row of servers connect to all of the servers in that row. In this scenario, the cross connect is often located in the network cabinet and connects to interconnect patch panels in each of the server cabinets, creating three-connector channels as shown. This scenario makes it easy to add a server to a cabinet and simply bring it on line by connecting it to that cabinet’s interconnect patch panel.
How Do I Test a Cross Connect in a Data Center?
In the LAN, we’re almost always testing a copper permanent link that runs from the patch panel to the telecommunications room to a work area, excluding the patch cord to the switch and the equipment cord to the end device. In the data center, where a fiber cross connect may reside in the middle of the channel, what do we test?
Since permanent link testing is primarily to ensure that the fixed portion of the channel performs and eliminate the patch cords that are often swapped out, it may seem intuitive to test the permanent cabling sections separately. Not so fast! If you test from the patch panel at the switch to the first patch panel in the cross connect, repeat the process from the second patch panel in the cross connect to the patch panel at the far end, and then combine the results, it’s highly unlikely that the loss of multiple links added together would provide an accurate portrayal of the total link loss—especially since you’re eventually adding in two additional connection points once you add patch cords to your cross connect.
Ideally, your best bet when dealing with data center links that include a cross connect is to test through the cross connect, including the patch cords at the cross connect. In other words, from the interconnect panel at the near-end active equipment to the interconnect panel at the far-end active equipment.
Just make sure you use quality patch cords and stick with them at the cross connect. And if you’ve got a lot of moves, adds and changes going on in your data center facility, don’t forget to clean and inspect the connectors with your FI-7000 FiberInspector™ Pro or FI-3000 FiberInspector Ultra.


